
How to Start a Small Herb Garden Indoors: A Beginner’s Guide
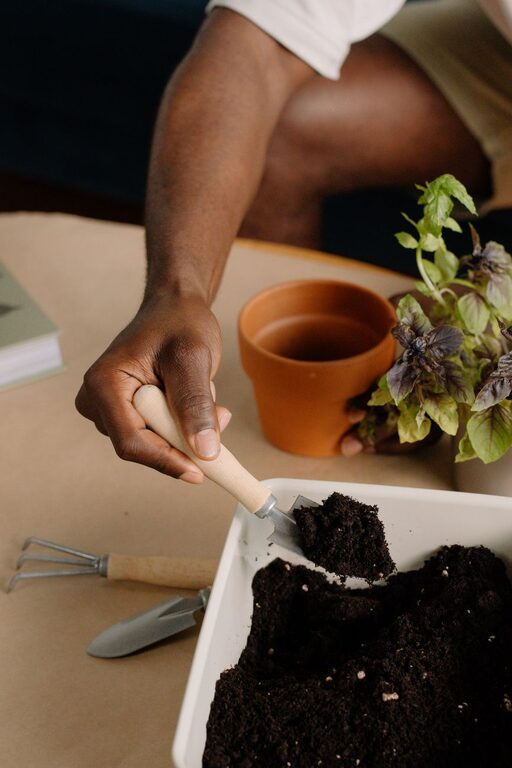
Bringing fresh herbs into your kitchen doesn’t have to wait until spring or require a big outdoor space. Starting a small herb garden indoors is a rewarding and practical way to enjoy fresh flavors year-round. Whether you have a sunny windowsill or a little corner in your apartment, growing herbs indoors is straightforward and enjoyable. This guide will walk you through everything you need to know to get started.
Why Grow Herbs Indoors?
Growing herbs indoors offers several benefits:
– Freshness: Pick herbs whenever you need them for cooking.
– Convenience: No trips to the store, especially for specialty herbs.
– Aesthetic Appeal: Green plants brighten up your living space.
– Cost-Effective: Save money on buying fresh herbs regularly.
– Year-Round Growth: Herbs can thrive indoors regardless of season.
Choosing the Right Herbs
Not all herbs are equally suited to indoor growing. Here are some easy-to-grow herbs ideal for beginners:
– Basil: Loves sunlight and warmth.
– Mint: Thrives with moderate light and is very hardy.
– Parsley: Does well in indirect light.
– Chives: Easy to grow and maintain.
– Thyme: Prefers bright light and well-drained soil.
– Cilantro: Requires cooler temperatures and good light.
Select herbs based on your cooking preferences and the light conditions in your home.
What You’ll Need
Before planting, gather the following supplies:
– Containers: Small pots with drainage holes or herb garden kits.
– Potting Mix: Use a high-quality, well-draining potting soil designed for indoor plants.
– Seeds or Starter Plants: Seeds are cost-effective, but starter plants offer quicker results.
– Light Source: A sunny window (south or west-facing) or a grow light.
– Watering Can: For gentle and controlled watering.
– Labels: To keep track of your herbs.
– Fertilizer: Balanced, water-soluble fertilizer for indoor plants.
Step-By-Step Guide to Starting Your Herb Garden
Step 1: Select Your Location
Herbs usually need around 6 hours of sunlight daily. Identify a spot in your home that gets plenty of natural light, like a south-facing window. If natural light is limited, consider using LED grow lights.
Step 2: Choose and Prepare Containers
Use pots with good drainage to prevent waterlogging. If using seed trays or non-draining containers, add a layer of small stones at the bottom to improve drainage.
Step 3: Planting Seeds or Transplants
– Seeds: Fill pots with potting mix, moisten the soil, and plant seeds according to the package instructions (usually about twice as deep as the seed size). Cover lightly with soil.
– Starter Plants: Remove plants gently from their original containers, loosen roots if bound, and plant in your pots. Fill around with soil and press gently.
Step 4: Watering
Water the soil gently until it is moist but not soggy. Overwatering can cause root rot, so allow the top inch of soil to dry before watering again.
Step 5: Provide Proper Light
Place your pots in the selected location. Rotate them every few days so all sides get equal light. If natural light is insufficient, set up grow lights about 6-12 inches above the plants for 12-16 hours daily.
Step 6: Maintain Humidity and Temperature
Most herbs prefer temperatures between 65-75°F (18-24°C). To increase humidity, you can mist the plants occasionally or place a tray of water nearby.
Step 7: Fertilize Occasionally
Feed your herbs with a balanced, water-soluble fertilizer every 4-6 weeks during the growing season. Follow the product instructions to avoid over-fertilizing.
Tips for Success
– Avoid Overcrowding: Give each herb enough space to grow.
– Prune Regularly: Snip leaves to encourage bushier growth and to harvest fresh herbs.
– Watch for Pests: Indoor herbs can attract pests like aphids or spider mites. Use natural remedies like neem oil if needed.
– Rotate Herbs: If some herbs are not thriving, move them to different spots to find the best growing conditions.
– Harvest Smartly: Harvest herbs in the morning for the best flavor. Use scissors to cut stems above the first pair of leaves.
Common Challenges and Solutions
– Yellowing Leaves: Usually a sign of overwatering or poor drainage. Adjust watering and check container drainage.
– Leggy Plants: Too little light can cause herbs to grow tall and weak. Move them to a brighter spot or add grow lights.
– Slow Growth: Could be due to nutrient deficiency; try light fertilizing.
Harvesting and Using Your Herbs
Once your herbs have grown enough, you can start harvesting. Snip off the stems as needed, but avoid removing more than one-third of the plant at a time. Fresh herbs can be used immediately in cooking, dried for later use, or even frozen.
Final Thoughts
Starting a small indoor herb garden is a satisfying project that brings freshness and natural beauty into your home. With a little attention and care, you’ll have fresh herbs at your fingertips, enhancing your meals and your living space. Happy gardening!